Getting your DVD VCR combo up and running is a breeze! Just follow these simple steps, and you'll be enjoying your favorite movies and shows in no time. Let’s break it down.
First, locate the right spot for your combo player. Make sure it's near a power outlet and has a clear line to your TV. Once you’ve found the perfect spot, plug it into the wall. It’s always best to avoid using extension cords if you can.
Now, grab those cables. You’ll typically find three options: RCA cables (the red, white, and yellow ones), an HDMI cable, or a coaxial cable. If your TV has HDMI ports, use an HDMI cable for the best picture quality. Just connect one end to the DVD VCR combo and the other to your TV. If you're using RCA cables, plug them into the matching color ports on both the combo and your TV.
Time to power things up! Turn on your TV and set it to the input source that matches where you connected the combo (like HDMI 1, AV1, etc.). Then, switch on your DVD VCR combo. You should see a welcome screen or setup prompt.
Finally, follow any on-screen instructions to finish your DVD VCR combo setup. You might need to set the clock or scan for available channels. That’s it! You’re all set to start watching your favorite movies and shows with your new combo player.
Connecting to Your TV Made Simple
Connecting your DVD VCR combo to your TV is a breeze. Whether you're rocking an old-school tube TV or a sleek flat screen, you can get it set up quickly and easily. Let’s dive into the steps so you can enjoy your favorite movies in no time!
First, check the back of your TV. Most likely, you'll find a set of color-coded RCA ports. These ports usually have yellow, red, and white holes. Connect the matching cables from your DVD VCR combo to these ports. Just match the colors and plug them in. Simple, right? Remember, yellow is for video, while red and white are for audio.
If your TV has only one audio input or you have a newer model without RCA inputs, don’t worry! You can use the coaxial cable instead. Connect one end of the coaxial cable to the "RF OUT" on your combo and the other end to the coaxial port on your TV. This is a classic option that works like a charm.
Once everything is plugged in, turn on your TV and your DVD VCR combo. You may need to select the right input channel on your TV. This could be AV, input, or channel 3 or 4, depending on how you set it up. Check your TV remote for the input button and cycle through the options until you see your combo’s picture.
And just like that, you're all set! Now you can enjoy a fantastic movie night with minimal fuss. With this easy DVD VCR combo setup, you’ll have no problem connecting to your TV and kicking back with your favorite films or shows.
Troubleshooting Common Issues Fast
If you're diving into your DVD VCR combo setup, it's a breeze most of the time. But sometimes, issues pop up that can throw a wrench in your plans. Don’t worry! Here are some quick fixes for common problems that might come your way.
First up, if your TV isn’t recognizing your DVD VCR combo, make sure all the cables are properly connected. Double-check the input settings on your TV. You might be on the wrong channel. Switch to HDMI or the AV channel if you’re using those connections. It’s an easy fix that gets overlooked a lot!
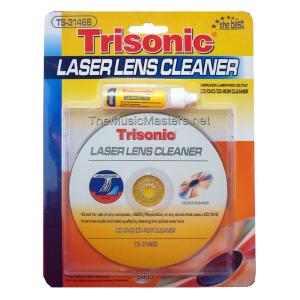
If your combo isn’t playing DVDs or tapes, this can be frustrating. Check for dust or grime on the discs or tapes. A quick wipe with a soft cloth usually does the trick. If the tape gets stuck, don’t force it. Try unplugging the device and gently rewinding the tape before powering it back on.
Last but not least, if you’re experiencing sound issues, ensure the audio cables are connected right. Sometimes they can get loose or switched around. Also, check the volume on both your device and TV. It's a simple check but often overlooked!
With these tips in mind, your DVD VCR combo setup should be smooth sailing. If you run into other hiccups, just take a deep breath, and remember that there’s always a solution out there!
Tips for Maintaining Your Combo Device
Keeping your DVD VCR combo in top shape doesn’t have to be a chore. A little bit of care goes a long way and can help you enjoy your favorite movies and shows without any hiccups. Here are some simple tips to maintain your device.
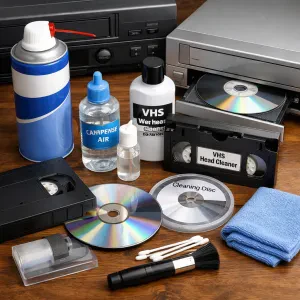
First off, dust is your enemy. Keep your combo player clean by regularly dusting it with a soft cloth. Avoid using any harsh cleaners; they can damage the finish. Just a gentle wipe now and then keeps it looking sharp and prevents any dust build-up that could interfere with performance.
Make sure to check the cables and connections. A loose or damaged cable can mess with your viewing experience. Inspect the video and audio cables regularly. If you see any fraying or wear, replacing them is a quick fix that can save you from headaches later on.
Also, keep your discs in good shape. Always store DVDs and VHS tapes in cases when you’re not using them. Scratches or dirt can lead to playback issues. If you notice a disc is dirty, clean it with a soft, lint-free cloth. Wipe from the center out to avoid scratches.
Finally, give your unit a break. If you’re binge-watching, your combo device might get a little hot. Allow it to cool down every couple of hours. This is especially important if you’re doing a DVD VCR combo setup marathon. Taking these steps can help extend the life of your combo and keep all your favorite films and shows at your fingertips.